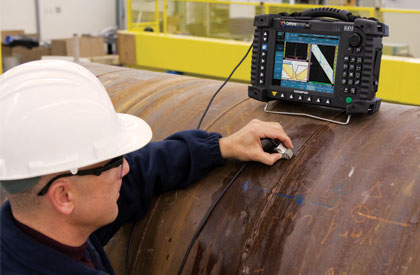
We are delivering advanced Ultrasonic inspection services, with use of Total Focusing Method (TFM), Phased Array Ultrasonic Testing (PAUT) and Time of Flight Diffraction (TOFD) for weld inspection applications. Our Advanced NDT Laboratory operations, are conformed with ISO 17025 requirements.
Working Principle
TFM
PAUT
TOFD
TFM is an state-of-the-art advanced ultrasonic technique, used for the inspection of fusion-welded joints of metallic materials. Using the Full Matrix Capture (FMC) acquisition, TFM is implemented as a post-processing algorithm, that allows the ultrasonic beam to synthetically focus at every point in the target region. The algorithm is based on the delay and sum process, essentially adding echoes from discontinuities to maximize the amplitude at the corresponding grid point.
PAUT is a proven advanced ultrasonic technique utilizing array probes to increase inspection flexibility and reliability. In weld inspection applications, commonly, angled wedges are used to emit and receive shear waves. Multiple groups may be employed (Sector Scans, Linear Scans, Compound S-scans), where each group is optimized for increased sensitivity to specific defect types.
TOFD is an advanced technique of ultrasonic inspection that leverages on existing ultrasonic testing methodologies, thereby bringing a whole new range of testing and detection capabilities to the NDT forefront. In contrast to PAUT, TOFD relies mainly on diffracted echoes, which makes the technique ideal for the detection and sizing of vertical cracks in the weldment.
Why Advanced NDT is Chosen by US, over Radiography
Although radiography testing (RT) was the primary NDT method suggested by the manufacturer, WE concluded that alternative advanced NDT methods, like TFM, is definitely a more advantageous method.
- RT inspection would have required twice as many inspectors.
- Implementation of a safety zone was deemed too difficult. Inspection activities has to be performed during the night, while other employees are not present.
- It is estimated that the complete project using RT, would take five times longer than PAUT or other advanced ultrasonic applications.
- On top of all the extra costs associated with RT, are consumables such as films, photo chemicals, and waste disposal of the lead foils.
- The most important aspect of choosing TFM/PAUT or similar over RT, is related to the probability of detection. Lack of side wall fusion, which is a critical flaw to measure, is not well detected by radiography.
Testing Applications
Welding
- The Long Distance Pipe Lines Inspection System consists of six parts, including multi-channel ultrasonic flaw detector, TFM/PAUT/TOFD probe, wedge, crawler, analysis software, water irrigation device, calibration and reference test blocks. Using specialized software, data acquisition and analysis can be easily performed.
- Imaging of butt welds in pipes and pressure vessels and large structures, Bifurcation lines, Valve bodies, etc.
- PAUT scans on complex geometries including painted cylindrical, trapezoidal fuel transport tankers
- Individually tailor development of qualification blocks, configuring rigs for data collection and levels of post-analysis reporting.
- 100% weld volume coverage at scanning intervals of 1mm, of high pressure and high temperature piping welds at power station sites using encoded scanning on circumferential and seam welds between 20mm to 75mm wall thickness.
- Inspection of small bore tubes – Internal diameter of down to 38mm; having a minimum wall thickness of 5mm.
- Inspection of complex geometry branch welds with variable weld profile using encoded scanning for accurate sizing of internal defects.
- Turbine and generator components inspections with special focus on areas of high stress concentration such as for tree serrations of turbine blade roots and geometry changes along exciter cooling fans.
- Detection of corrosion wastage in wind tower foundation bolts or other similar HOLD DOWN BOLTS with reliable monitoring of corrosion wastage along the length of bolts up to 5 times its diameter.
- In-situ inspection of transverse cracks in shafts, axles, spindles, hold down bolts.
- Precise detection, measurement and reporting of smaller cracks for condition monitoring or repair.
Scanning Solutions
Depending of each particular inspection project, we is using the appropriate Crawler / Scanner, in order to get the best results from scanning options.
We propose either, Semi-Automatic Ultrasonic Testing (S-AUT) solutions, as well as, full Automatic Ultrasonic Testing (AUT) solutions. applications:
- Multi Probes Crawlers for flat and curved surfaces [S-AUT]
- Specific crawlers for angle welds and joints [S-AUT]
- Specific crawlers for High Diameter Pipe Line inspection, on a fixed route [S-AUT]
- Robotic crawlers for inspection of flat or curved surfaces at height, like tanks shell or similar [AUT]
- Automatic UT solution for Long-Distance Pipeline in Petrochemical Industry [AUT]
- Pipe lines and tubes inspection, with robotic or Semi-Automatic crawlers, depending on diameter and inspection position
Calibration Blocks
Our Laboratory Staff is working consistently to guaranty the maximum efficiency and reliability of our Testing Results.
Specific Calibration Blocks for each method, position, for different materials, related to different International Standards, are designed and developed within our Laboratory, in order to build in house our Know-How, necessary for service delivery of excellence.
Development of inspection capacity for this category of materials, usually includes many, if not all, of the following:
- Modelling & Simulation
- Fabrication of mock-ups and samples containing realistic defects
- Procedure development
- Validation and subsequent training
Such development of inspection resources and capacity represents for our Top Management, substantial commitments of time, high qualified personnel and significant capital investment.